Wednesday, December 7, 2011

shaped wood frames tutorial

What an exciting day it has been. It was so fun to be featured on
The Daily Dish (click link to go to video tutorial)
and share this tutorial with you all!
I'm sure I am not the only one that has found a way to make these mdf frames but I would like to share with you how I make them.
ITEMS NEEDED:
  • MDF board (I purchased mine from Home Depot, the 1/2"thick for~$10 and the 3/4" thick for~$11.50)
  • pattern for frame
  • skill/jigsaw (you can find the saw for around $30 in a quick search I found THIS)
  • drill
  • sandpaper
  • if painting: primer (Krylon), spray paint or acrylic paint
  • if mod podging: mod podge (of course), paper
  • painters tape: if painting stripes
This is just half of the large mdf board from Home Depot, if you are making 12"x12" frames you can 8 frames out of 1 large board. depending on the thickness you choose and the paint the cost is about $1.50-$1.75 per frame! You can't beat that! The large stripped frame in a previous post and featured on the video is one full board that I free handed the pattern for

Next trace your pattern for frame (you can free-hand it or use paper with decorative edges, I like My Minds Eye paper for this) Try not to get too complicated with your pattern, the more curves and edges, the more difficult it is going to be to cut out.

I cut out a 6x6 paper to trace the opening part in the middle
Use the skill/jigsaw to cut out the center. You might want to make a few practice cuts if you aren't very comfortable with the saw, just please be careful! It really isn't too bad, it just takes some getting used to.
 Once the outside is cut, use a drill to cut out the center, ignore the spot I have in the center of the frame, drill the hole in one of the corners and then use the skill saw from there.

 *optional next step: if you have access to a router, now would be the time to pull that bad boy out. A router will give the frame a bumpy edge (see photo bellow) and a fun texture.

Then sand, sand, and sand! Sand paper is perfectly find for this but....
 if you happen to come across a metal file in your tool bag, celebrate just a little bit because this bad boy really helps in the creases.
 Once you are all done sanding you are really to funk-ify your frame however you like
  • spray paint: if you will be spray painting use a primer first, absorbs paint like no other so primer will help you not have to do so many layers.
  • paint stripes: first prime the board, then apply the first paint color (the lightest one), measure out your stripes and tape off, paint your next color.
  • acrylic paint
  • use glaze to antique
  • mod podge paper or fabric: paint or stain the edges of the frame, then apply thin layer of mod podge to frame and add paper, smooth out with popsicle stick or credit card. If the paper over laps, just use sand paper to clean up the edges.
This is just black acrylic paint, you can see how the frames absorbs the paint. 
 This is spray painted and then the edges were sanded. to add the picture you can adhere your photo to cardboard or something stiff and then use a good tape to bond it to the frame.
You can display these babies on easels or use a picture hangers for the back.

Tuesday, December 6, 2011

coming soon....

A full tutorial on these wood frames.... WOOOHOOOO!!
I also have a promise. I promise to post something new at least once a week. I am a full time mom and sometimes it is hard to take the time to do so, but this is my goal.... and I am going to have some fun doing so!

Magnetic family tree

A couple of years ago a local craft/paper (Heartland paper) company had a beautiful magnetic family tree.  It was beautiful and perfect for my home, it was also perfect for a woman's group activity (hurray for Relief Society!)
This is my board and my lovely family. This one is 16"x20". The paper is just mod podged on to the magnet board. I used e6000 to adhere the bottle caps to the magnets and a 1" hole punch to cut out each photo. Each bottle cap should have some leaves on them, but I got a little lazy.
There are many places around me you can find a magnet board, but because I was getting them in bulk I chose Etsy. She also sold me the bottle caps. I got to thinking that it would be an awesome birthday gift/undertaking to make this for my grandmother. I come from a large family, a VERY LARGE FAMILY. To fit the full 160+ bottle caps I needed a large board, I did a 40"x50".
Some perspective of just how big this board was.
 I measured the paper and designed and drew out the tree, sorry I have no pattern for that but I did use a poster board  to make a pattern from first and then drew it out on paper.
I had to section them off into families because there are just SO many family members!
The finished product, hanging on Nonna's wall.

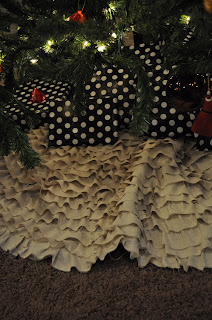
Ruffle tree skirt

Like many other ladies with a good eye, I pinned THIS on pinterest and knew I didn't want it to just be a "someday" pin... I had to make it asap.


So I did, of course. After some blisters and loving husband to tend after the little ones, I finished!
Just some notes, my ruffles are 2" a friend of mine did this skirt with 3" ruffles which means less rows but it was breath taking, I kind of wish I would have done 3" just because of the time.
You get to choose the lesser of 2 evils, if you use a high temp glue gun, you get burned... use a glove (garden, snow, etc.)... if you use a low temp glue gun you will get blisters from squeezing the trigger.
My fabric is muslin from hobby lobby (originally $5 a yard but 40% off!) I used a canvas drop cloth like in the tutorial, mine was a 5x5 from home depot (~$7)
I love it and am so happy to finally have a beautiful tree skirt!

Wednesday, November 16, 2011

Fall decor

 I decided I needed to finally take down Halloween, and since I refuse to put up Christmas until after Thanksgiving I needed that fall transition.
This month we have started a gratitude chain, daily as a family we will find a handful of things we are grateful for and add to the chain. It has been a great opportunity to try to help Oliver understand what gratitude means, yesterday he added nursery, friends, and then listed all of his aunts, uncles and cousins.
Tutorial for the felt wreath:
Supplies: 1/2 yard of felt, hot glue gun, wreath form (mine is a small foam one from the dollar store)
cut circles ranging from 3-4" diameter. Next fold circles into many different ways ex. fold in half then half again. I played with many different ways to fold so they wouldn't look so uniform. Next just hot glue folded circles onto wreath form
Cost ~$3.50
The "Thankful" frame is just some scrapbook paper with painted chipboard letters. I like that the chipboard letters are simple yet they give some dimension. This frame will stay on my table and I trade out the picture for every holiday.

 I think this wreath looks better in person, I don't love how it looks in a picture. But I also use this wreath all year long and trade out the embellishment. These are felt flowers. you first cut a circle and then cut the circle spiral like (does that make sense) and then roll up the cut circle into a rosette. I like when the circle isn't perfect, I add some curves as I cut the spiral. This way when you roll up the rosette it isn't all uniform. I added wire to the back of each rosette and then just stuck them into the wood wreath.
I'm kind of a cheap person, so when I decorate I try to use something as the 'base' and then build up/take down from there.
This guy isn't new, I made him last year. I think I saw this on Good Things Utah? but this is mostly paper cut into ~3" & 2" circles and folded to make the feathers

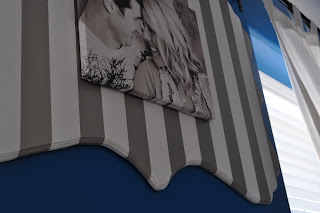
wood frame


Have you seen these wood frames online? Have you seen their price tag?
Well I love the look just not the price
With just a hand saw and some MDF you can recreate a very similar product.

 I would suggest maybe finding a shape you like online and print a blueprint of it, this was done free hand.
This board is also about 1/2 inch thick, I would maybe do a full inch or even thicker. But hey it cost about $13. ($10 for the wood, and $3 for a can of spray paint) Router the edges, if you do not have access to a router it still looks pretty good just a plain edge, or just start baking all those carpenters you know cookies in hopes they will let you borrow theirs. Once routed give it a good sanding to even out the rough edges and then paint.

Eventually I will cut out the center like the picture above but I already had this canvas print and figured I would make use of what I already had.

Sunday, October 30, 2011

This is Halloween....

Meet the kiddos. Yes, they are adorable and I love them.
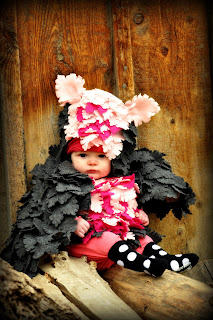
I wanted to over poor my little obsession with owls on my little miss.
 I took an old t-shirt of my sons and used about 1/4 a yard of the pink felt and 1/2 a yard of the grey felt. After who knows how many hours of sitting in front of the tv cutting out who knows how many feathers I stitched them on. believe it or not the stitching was pretty fast (I didn't want to glue them all because of the weight). I tore off the sleeves so they wouldn't be seen. Then guessed on the length of the wings. The felt keeps her pretty warm so trick or treating should be pretty nice!
I love how it turned out and think she makes a pretty adorable owl!

 This is my Gus man. He is a fire ball. I don't usually get lucky with him and pictures but when I do, they just melt my heart. I wanted to take advantage of him not really choosing what he wanted to be because he still doesn't quite understand Halloween. So I made him an Oompa Loompa!
 The brown turtle neck is from Walmart. I bought about 1/2 a yard of white fleece and laid out a pair of Gus' pants and drew out the pattern. It was a guess I got pretty lucky with. I used a bowl to exaggerate the humps in the legs so they would be even. I then cut out stripes and glued them on the shirt. The make up is bare minerals tanning powder:)

I am so excited for trick or treating tomorrow!!

Monday, September 12, 2011

old cabinet door repurpose

I needed something to put all of those adorable hair flowers I now have for my little miss, therefore this was created. Easy, simple and a fast craft.

Pregnancy Journal

I decided I didn't do very much documenting of my first pregnancy and so when I got that wonderful + sign for #2 I knew I wanted to have a keepsake like this. And so I journaled. Generally every week, sometimes I wasn't so fantastic about it until my 2nd and 3rd trimester. I would write little notes to my sweet baby among other things. And because I felt like such a dork asking my husband to take pictures for me and my blooming belly, I decided to use my self timer... Thank goodness for technology. Because I would do this without the hubs, my little man would often debut in the photo's, along with my dog.  I love how they turned out and have fun going back to my entries.

moss, my second love

I love the look of moss. I think it is absolutely beautiful and adds such a nice flair to anything. To me moss is not just a stapple in spring decor but in every day. When I was on the hunt for a baby mobile I saw these birds on a local program and fell in love. (see here for the pattern) I created the crown of the mobile out of branches from a tree at my parents house and added some moss to soften it up a little bit.

daisies and moss

This dangle above my rocker in baby girls nursery. Since my nursery is in more of a botanical theme (if that makes any sense) I knew I wanted something like this. I searched but all I could find were dinky little ones, which were cool but I wanted BIG! So I took myself to Hobby Lobby and found a bag of moss (~$4) a styrofoam ball (~$6 with coupon) and got to work. I poked a hole all the way through top to bottom and put the ribbon in and plugged in my glue gun. After way too many burns to count and a mess of moss, (this is definitely and outdoor project) I came up with these
If you have seen the daisy balls before you know just how beautiful they are in 3d, I'm not talking about the cheap flimsy ones, I mean the full lush thick ones. You may also know just how expensive they are... YIKES! In my opinion the flower selection at Hobby Lobby exceeds Roberts and Joanns but that's just me. As an added bonus Hobby Lobby had all there flowers at 50% off (which happens like every 3rd week or so) These particular daisies were $1, I needed about 35 for a larger ball plus another large styrofoam ball. I trimmed the stems so they were only like 2" long and poked them into the styrofoam. I didn't need to glue them in or anything, just poking the stems in worked just fine. Added with some cute ribbon and there you go

vaseline, who knew?

I first laid eyes on these beauties at our local DI. The one with out glass was priced at $10 the one with glass was priced at $30. I swooned and daydreamed of the possibilities then went and had myself a little chat with the manager, he offered the set for a grand total of $20! Of course I had to have them. They were perfect for my baby girls nursery.
Being 8 months pregnant in the heat of summer with a toddler trying to acrobat off the table, it was quite the task to complete. This was my first try with painting furniture. I studied a few fellow blogs to find the right technique and combined my favorites from here and here

First step: scrub furniture clean
Second step: remove door and hardware
Third step: apply vaseline in random places (I wanted a really shabby chic look and like to old, warn look and this was what helped me get there)
Fourth step: spray paint, spray paint and more spray paint (I used Krylon cream in satin, I didn't use a primer because I didn't know how that would work with the vaseline, therefore I used a lot of cans of spray paint maybe 4
Fifth step: apply ralph lauren faux glaze in a dark grey color, this took a lot of wiping, applying and wiping.
Sixth step: after all was dry I put this sucker back together and TADA....
Here it is!

Whimsical pinwheel

Welcome to Mossy Oak. I mostly wanted to have a space to share my persnickety personality. I love to craft, it helps keep my sanity. I find a great deal of inspiration from fellow bloggers, the tube and of course boutiques. When I see something I love I find a way to make it better fit "me" that is where all the fun is right? So lets start off with something simple
A pinwheel parade....
Nothing screams light and fun more to me than a pinwheel. They are just such a fabulous touch of whimsy that make me smile.
I found a basic double pinwheel pattern off of google and added some curves to give it more of a bird wing effect. I took 1 sheet of double sided 12x12 paper, and cut into 6" squares (so you should now have 4 squares, math was not always my forte) traced and cut out the pinwheel pattern on all four squares. Next, you take 2 of the 'ready to go' pinwheels and align them together and start to pull the wings to the center. you may need to play with shifting the paper around to get it to work. Man I wish I took some photos of the how to.